
My recent interest in furniture transformations has taken on a life of its own!
I just finished transforming my first piece from this:
To this!

It all started with an old door that I acquired from this adorable 1950’s bungalow I purchased last summer.
After scouring the internet for tutorials on how to transform an old door into a headboard, I stumbled across the BEST one out there: Mandi Gruber’s over at Vintage Revivals.
Mandi has great taste and even greater talent! I read every single post on her blog into the wee hours (some more than once) and also dropped by one of Mandi’s heroes, Brooke, over at All Things Thrifty. I was hooked instantly on what these talented gals are doing!
Starting with the headboard as my first project made me soooooo nervous – what if I seriously messed it up? I want it to be something really special when I’m all finished, so I decided to go shopping for something else.
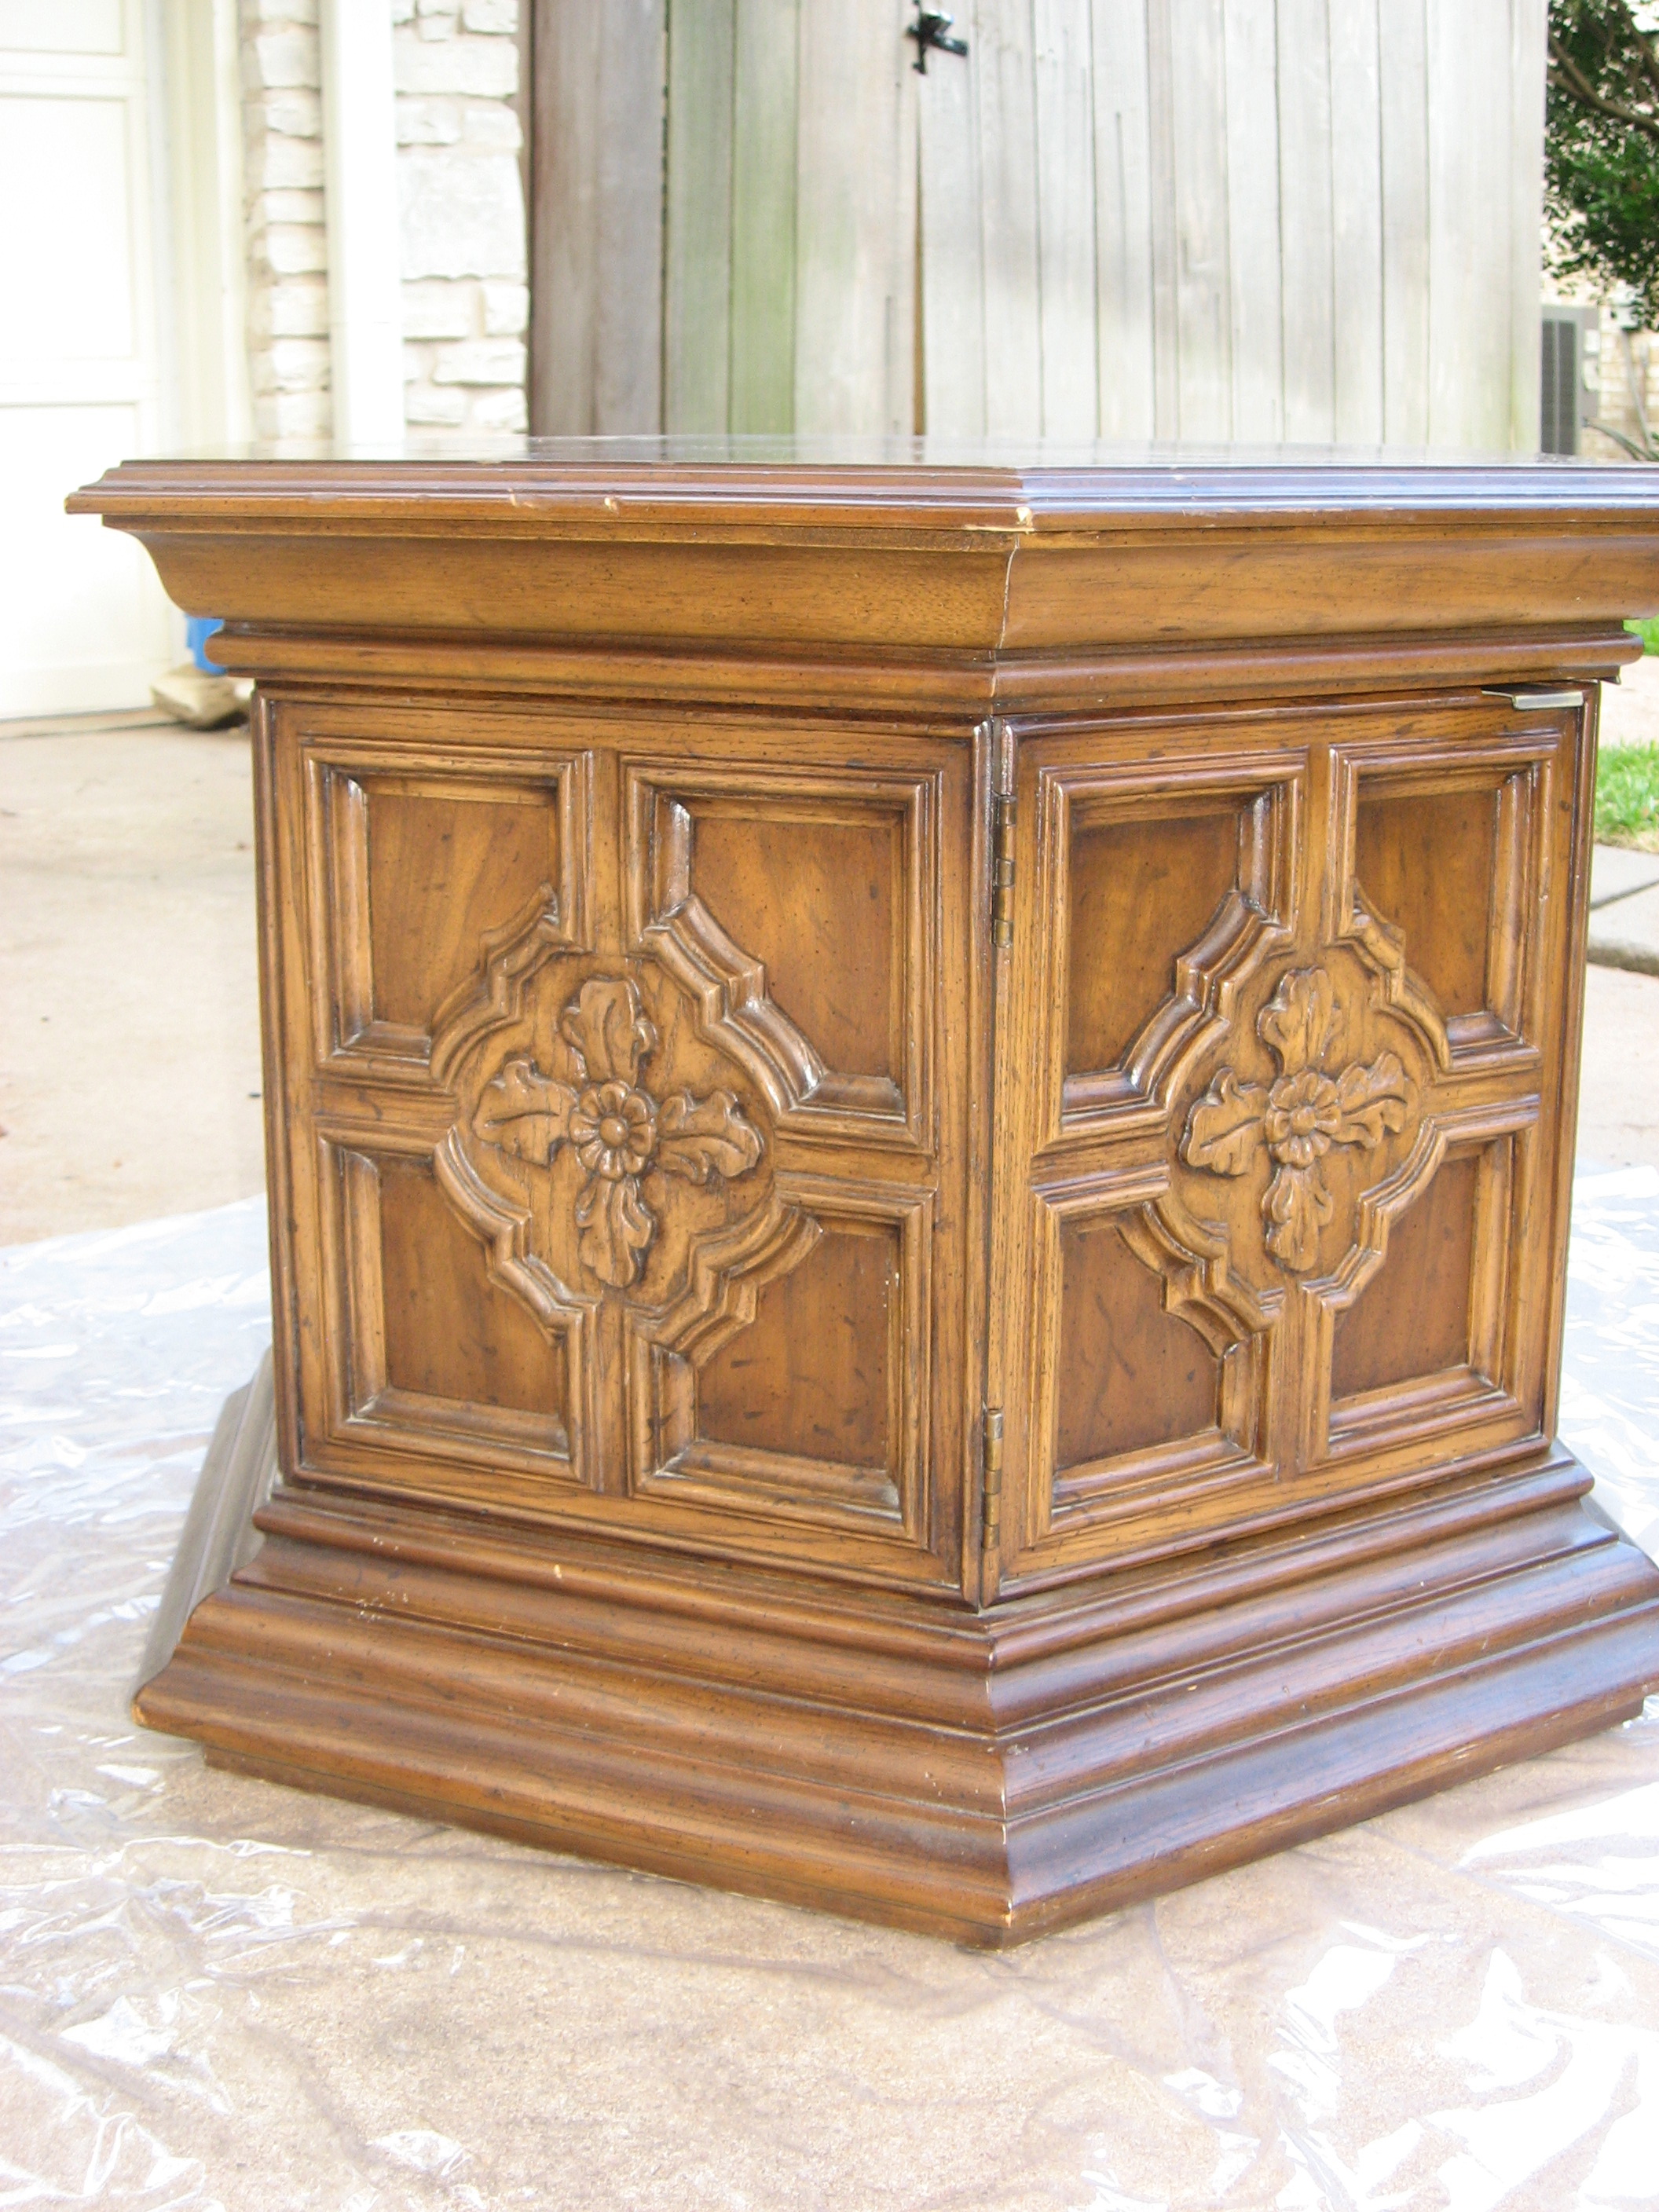
I wasn’t exactly sure what I was looking for, but after visiting a couple of estate and garage sales, I found this beauty at the Salvation Army for $20!
Solid wood and charming, but in definite need of a deep cleaning and some TLC.
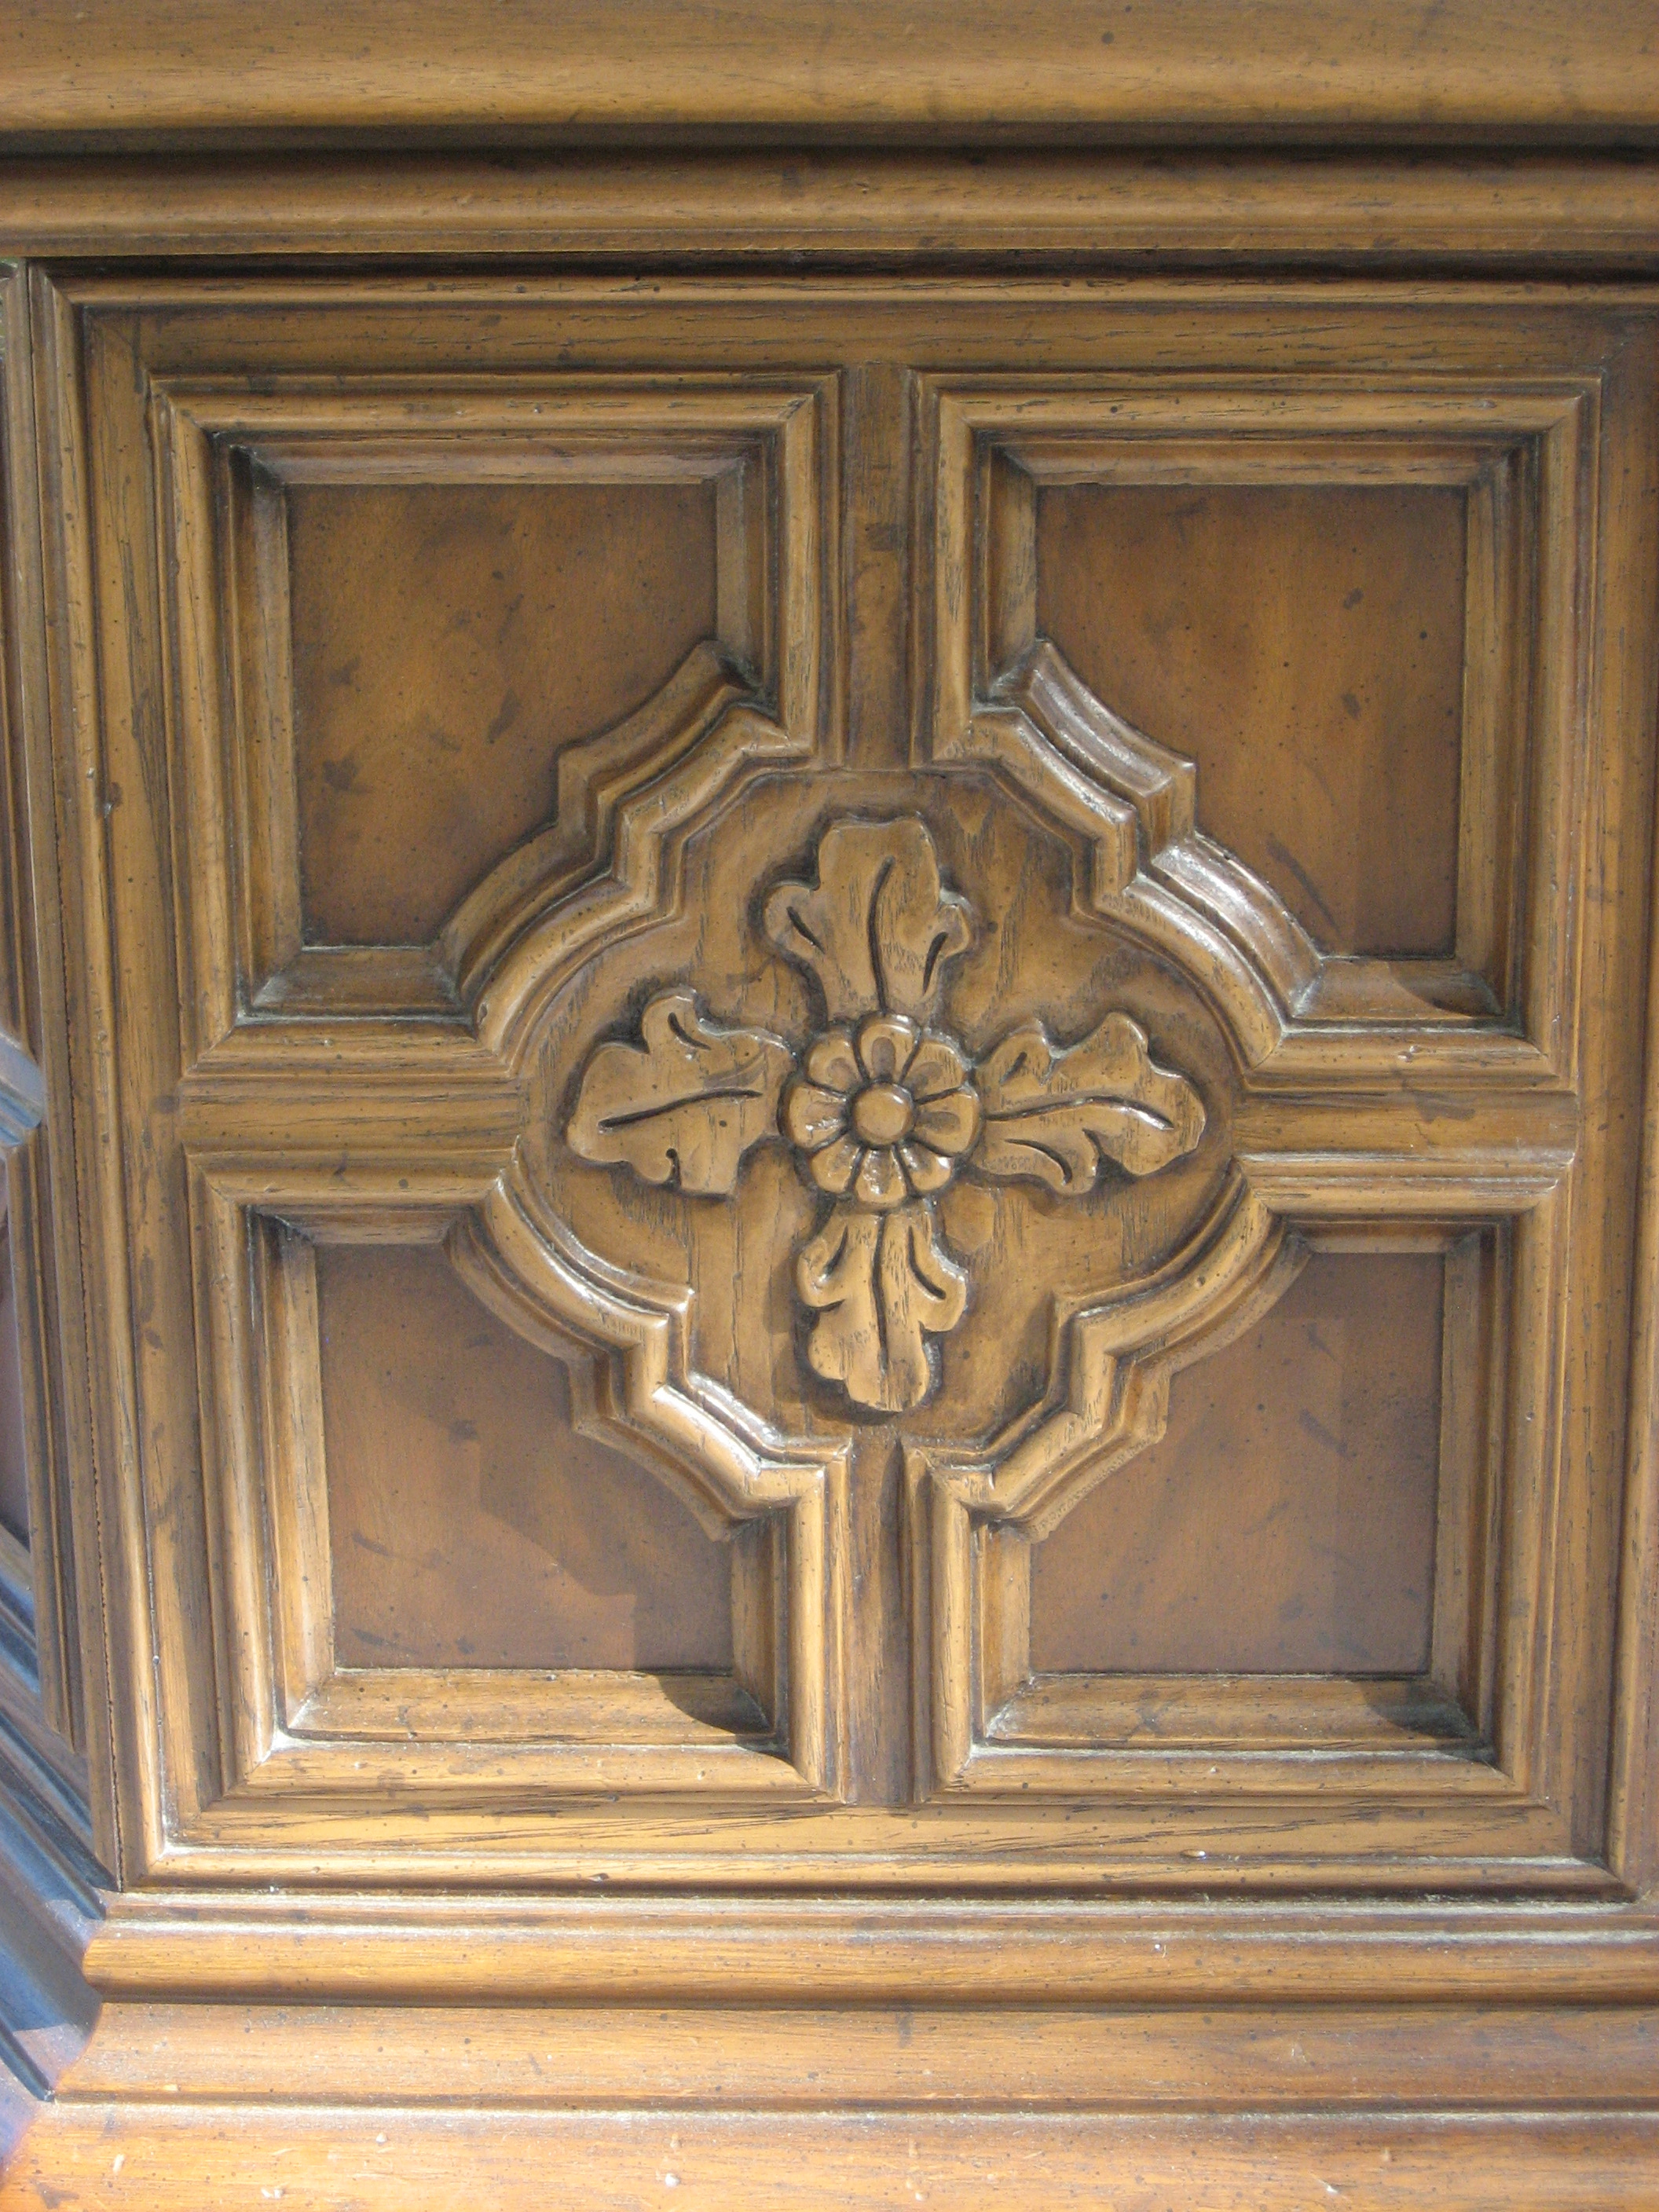
I loved the detail the instant I saw it and knew it would make for a great glazing project.
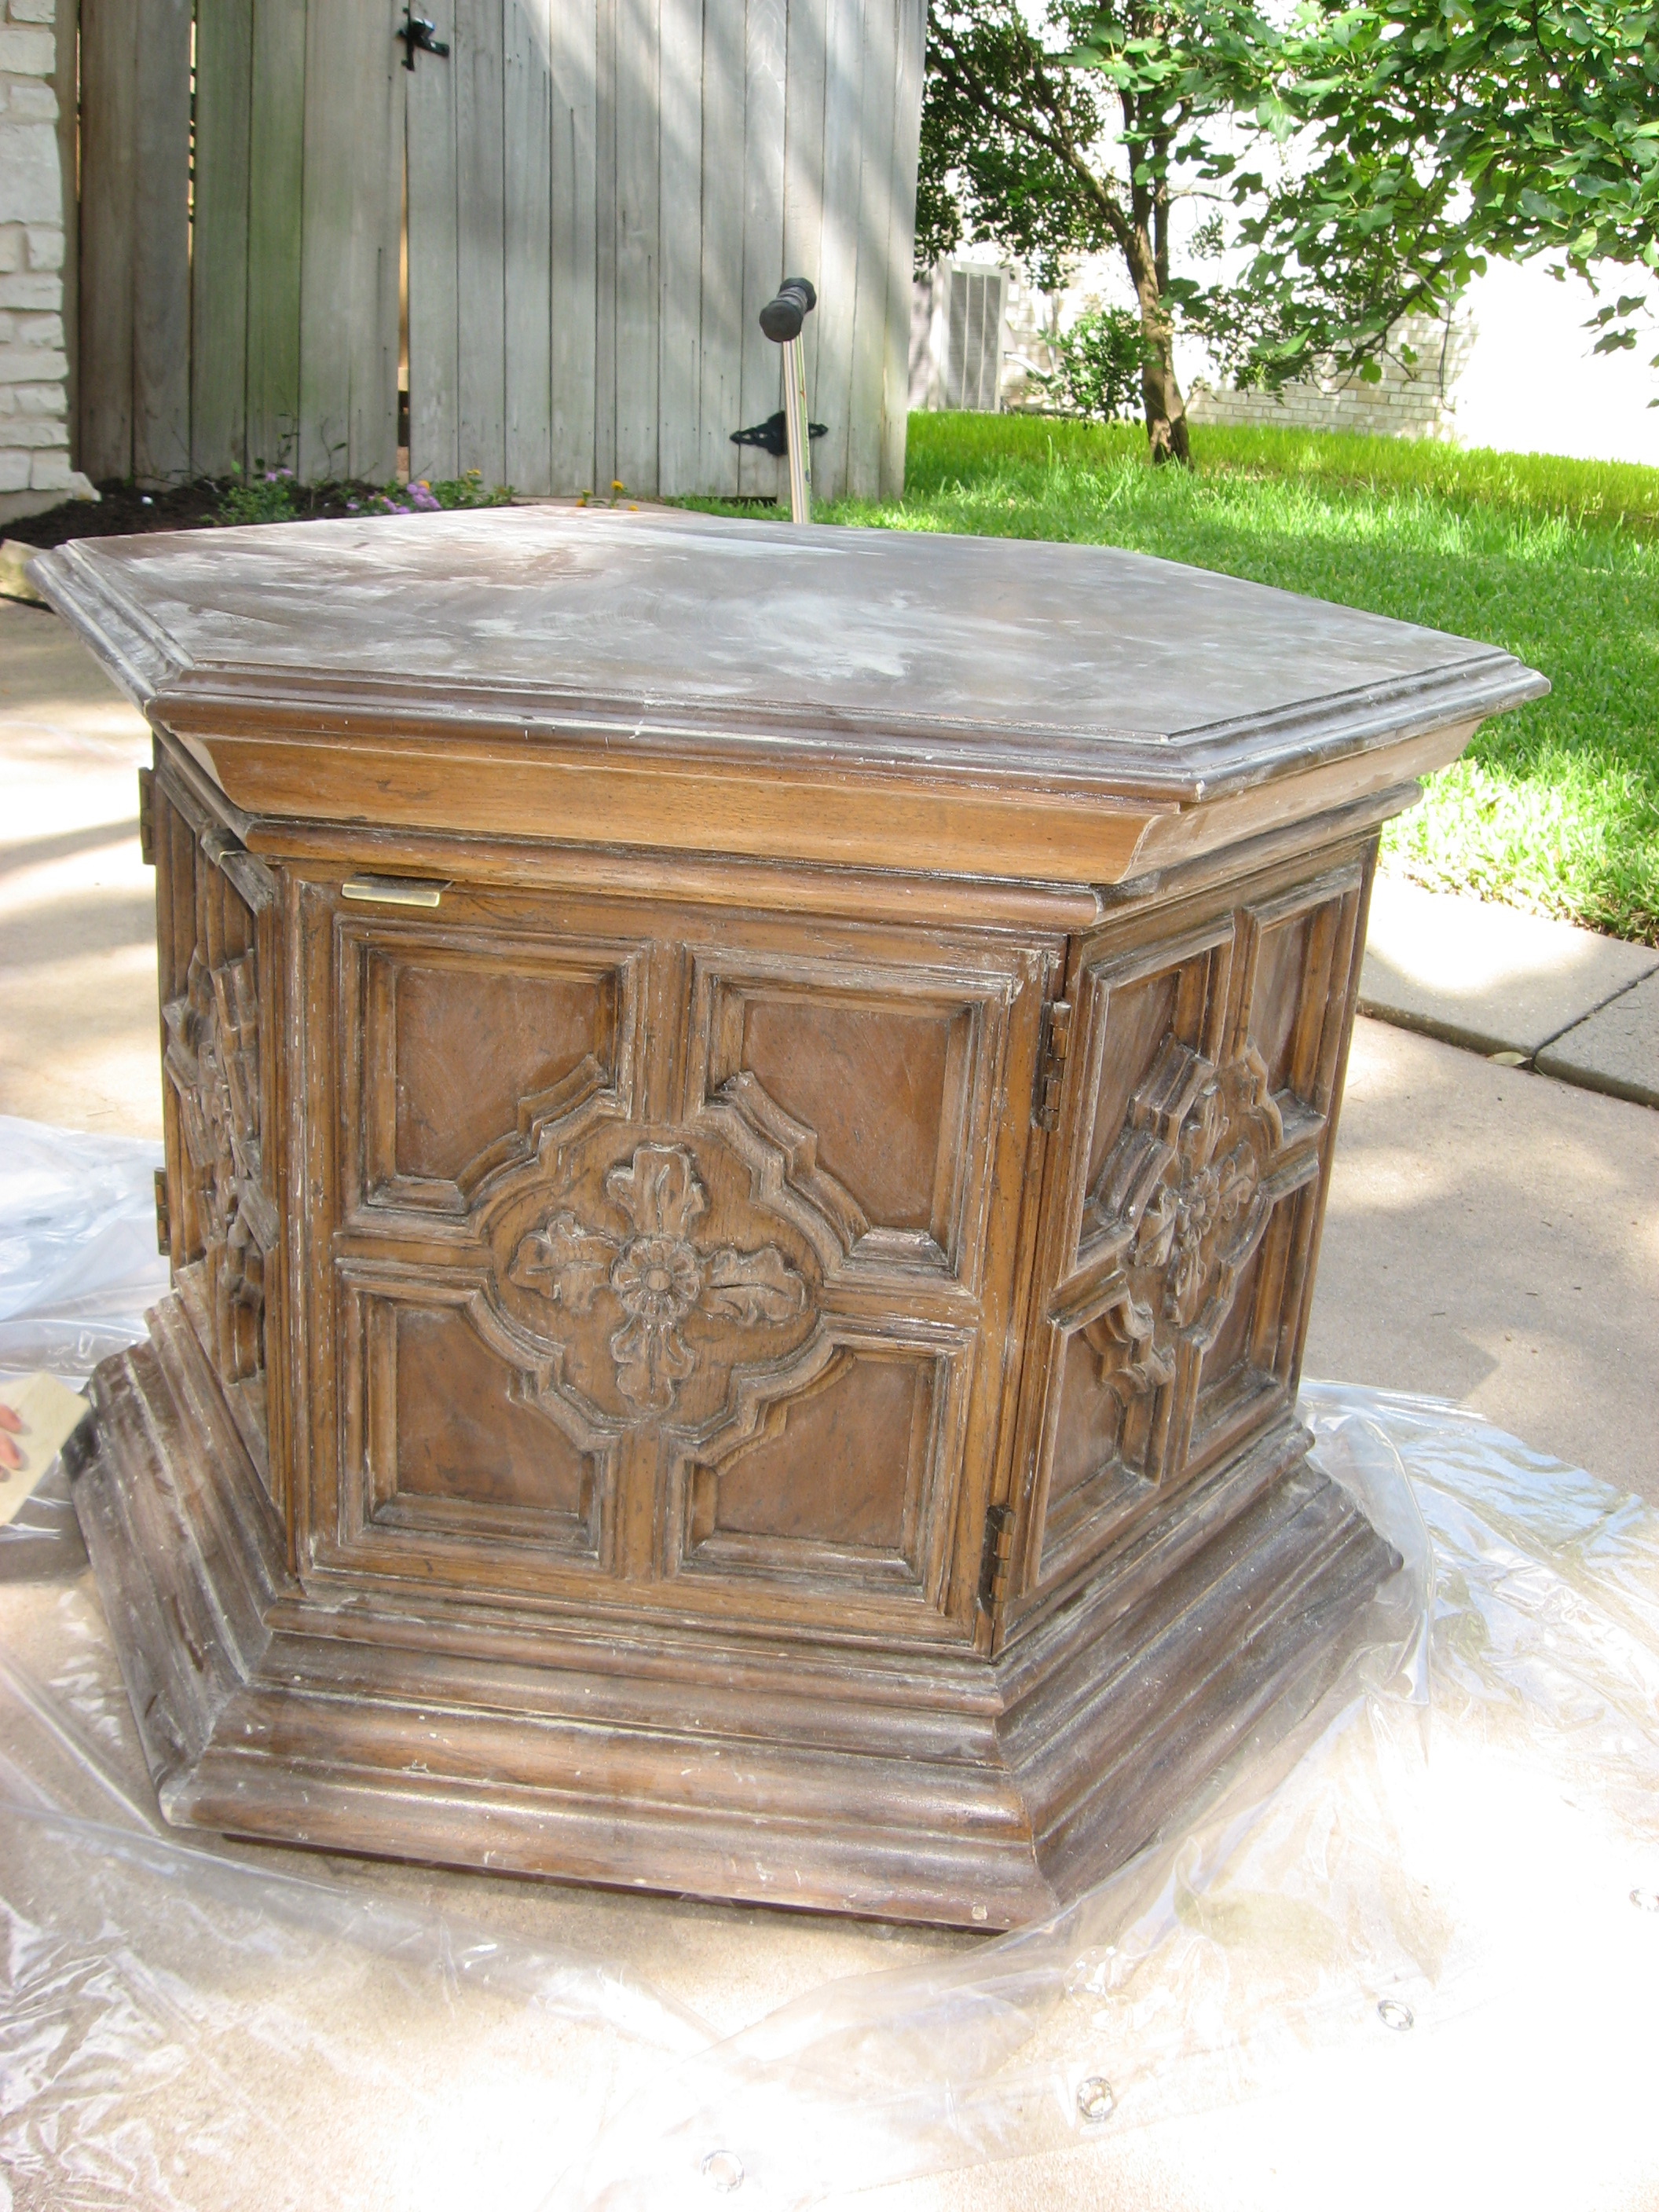
I thoroughly cleaned every crevice of this piece with TSP, using an old toothbrush to remove years of dirt and grime.

Then I sanded it with 150 grit sanding sponges to rough up the surface.
Next time, I’m planning to just clean and go straight to priming, using a bonding primer. I found that sanding it first made it difficult to get the primer and paint to come out even.
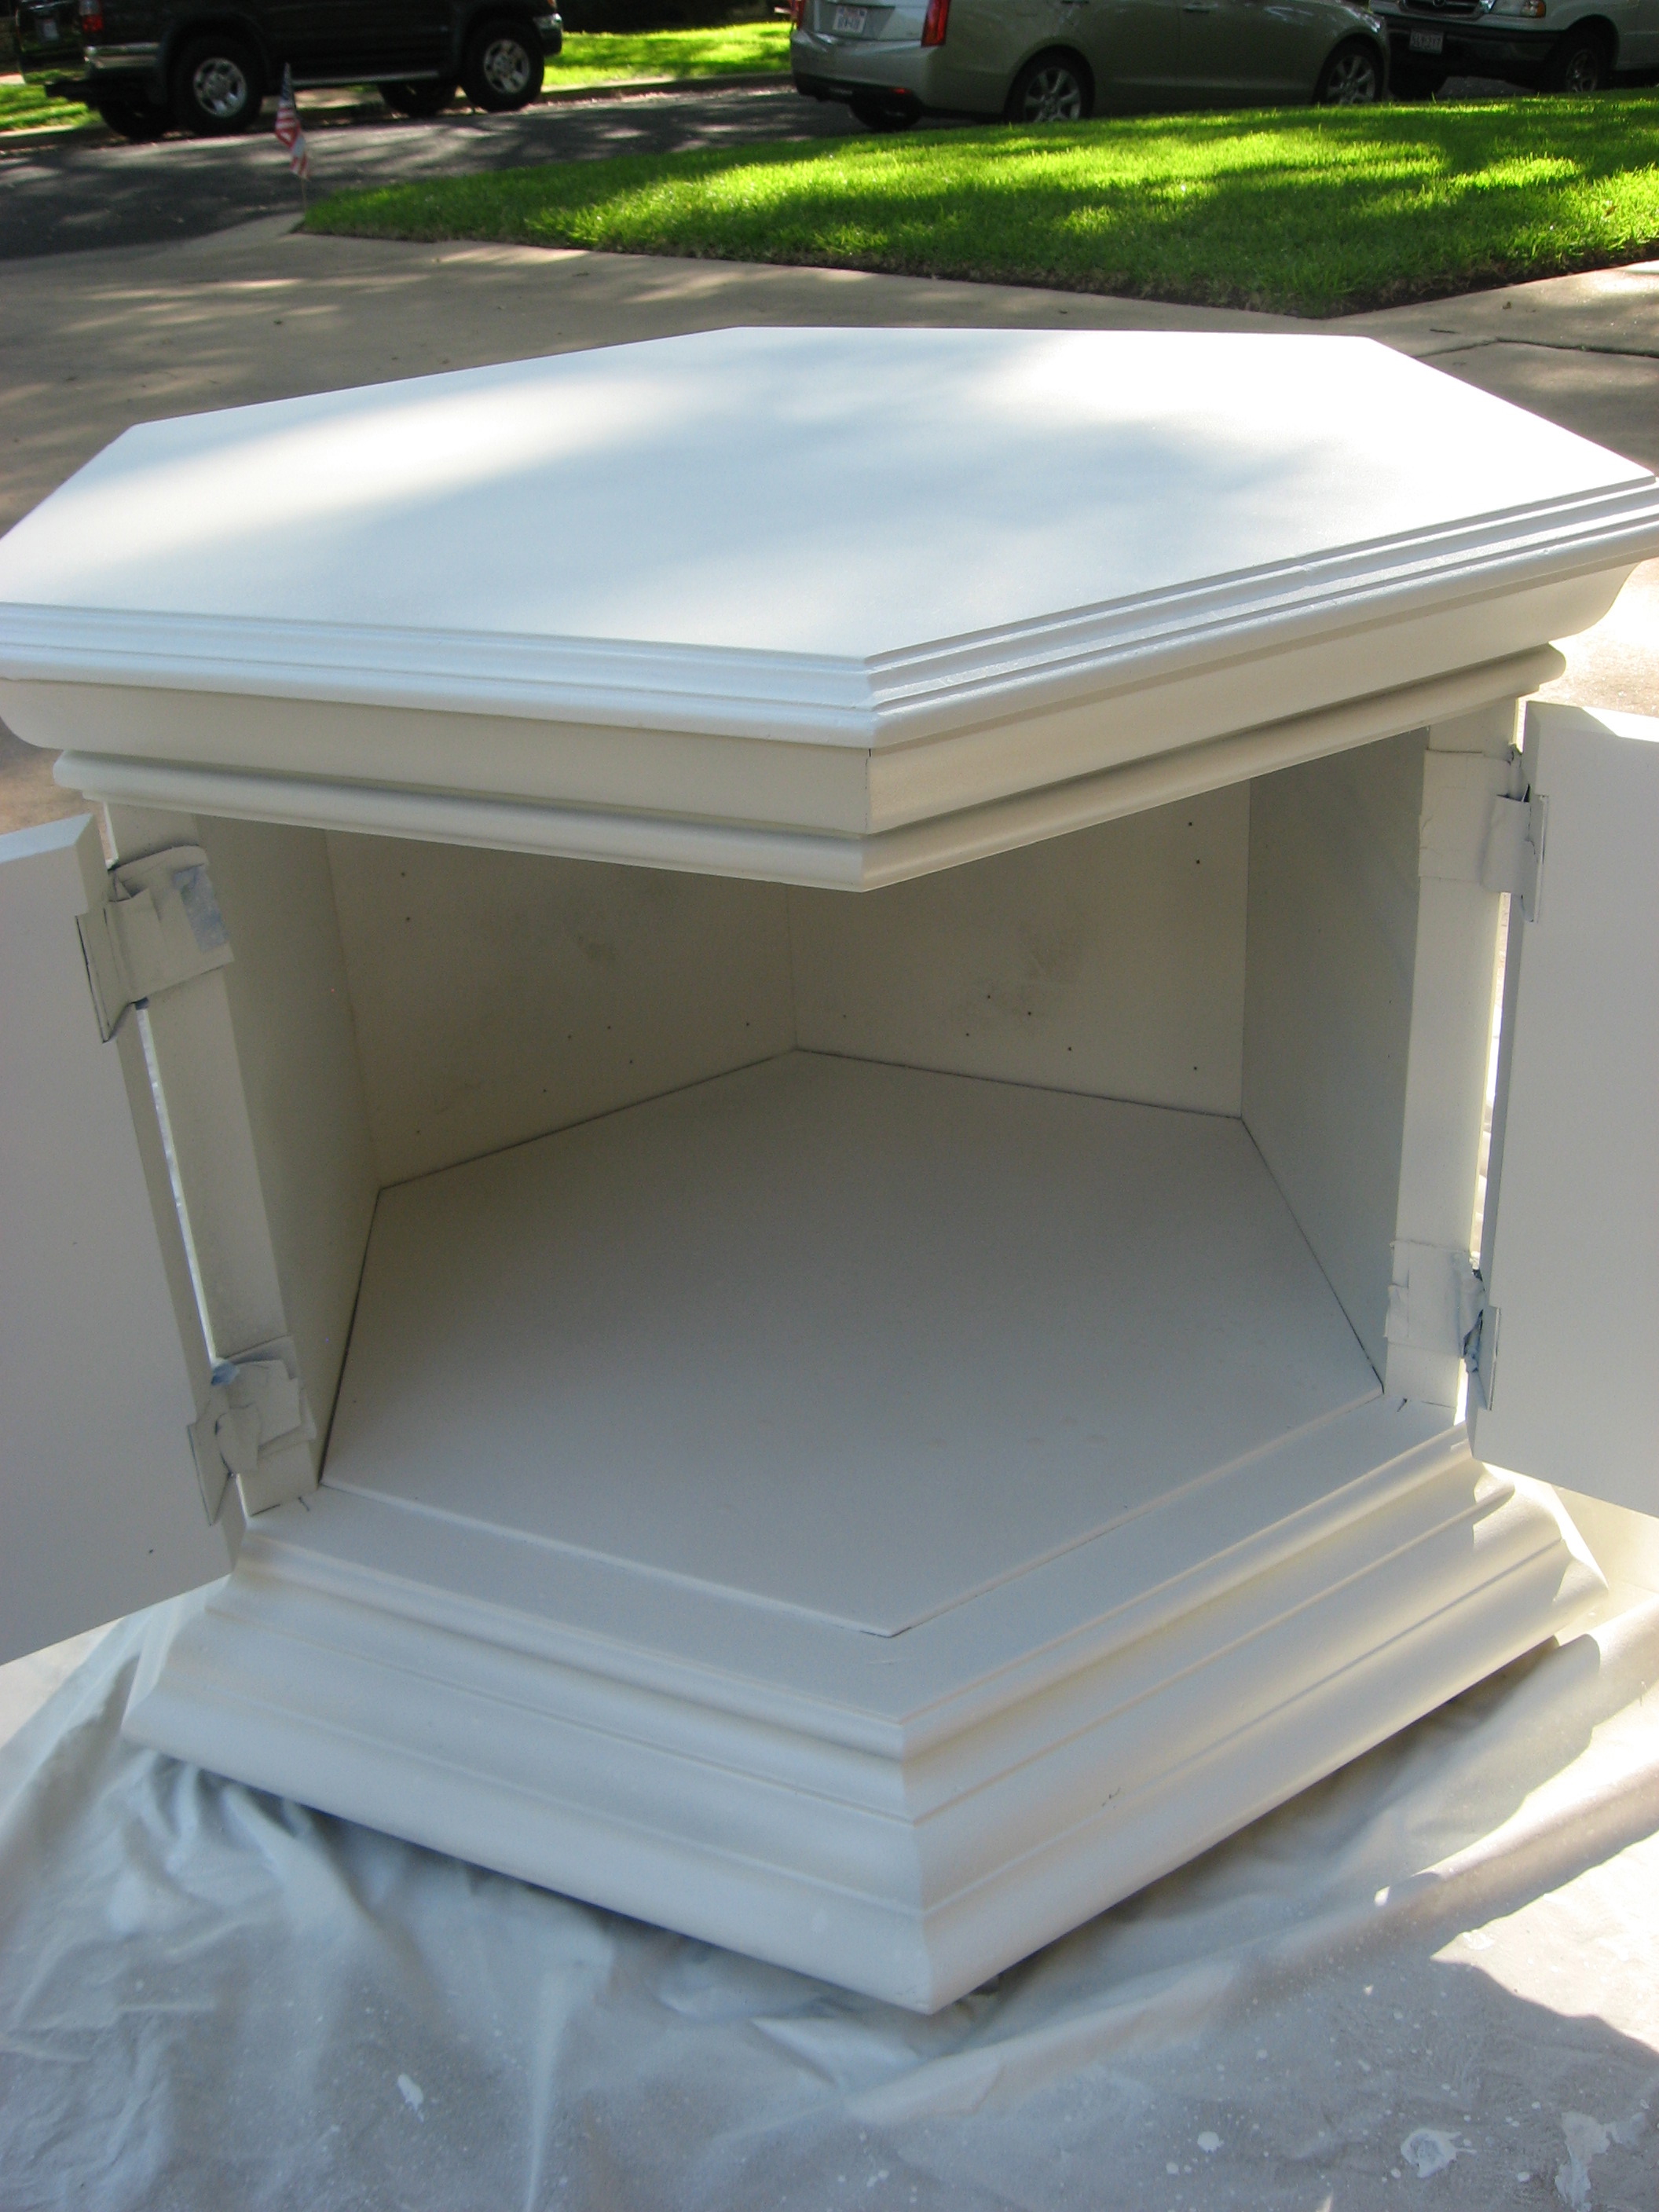
My first pass at spray-priming in the garage resulted in a thin white layer of dust all over everything.
The Hubsters got busy and set up this portable shop for me in the driveway, complete with tarps to protect the neighbors’ (and our) cars and houses.

Primed and ready for paint!
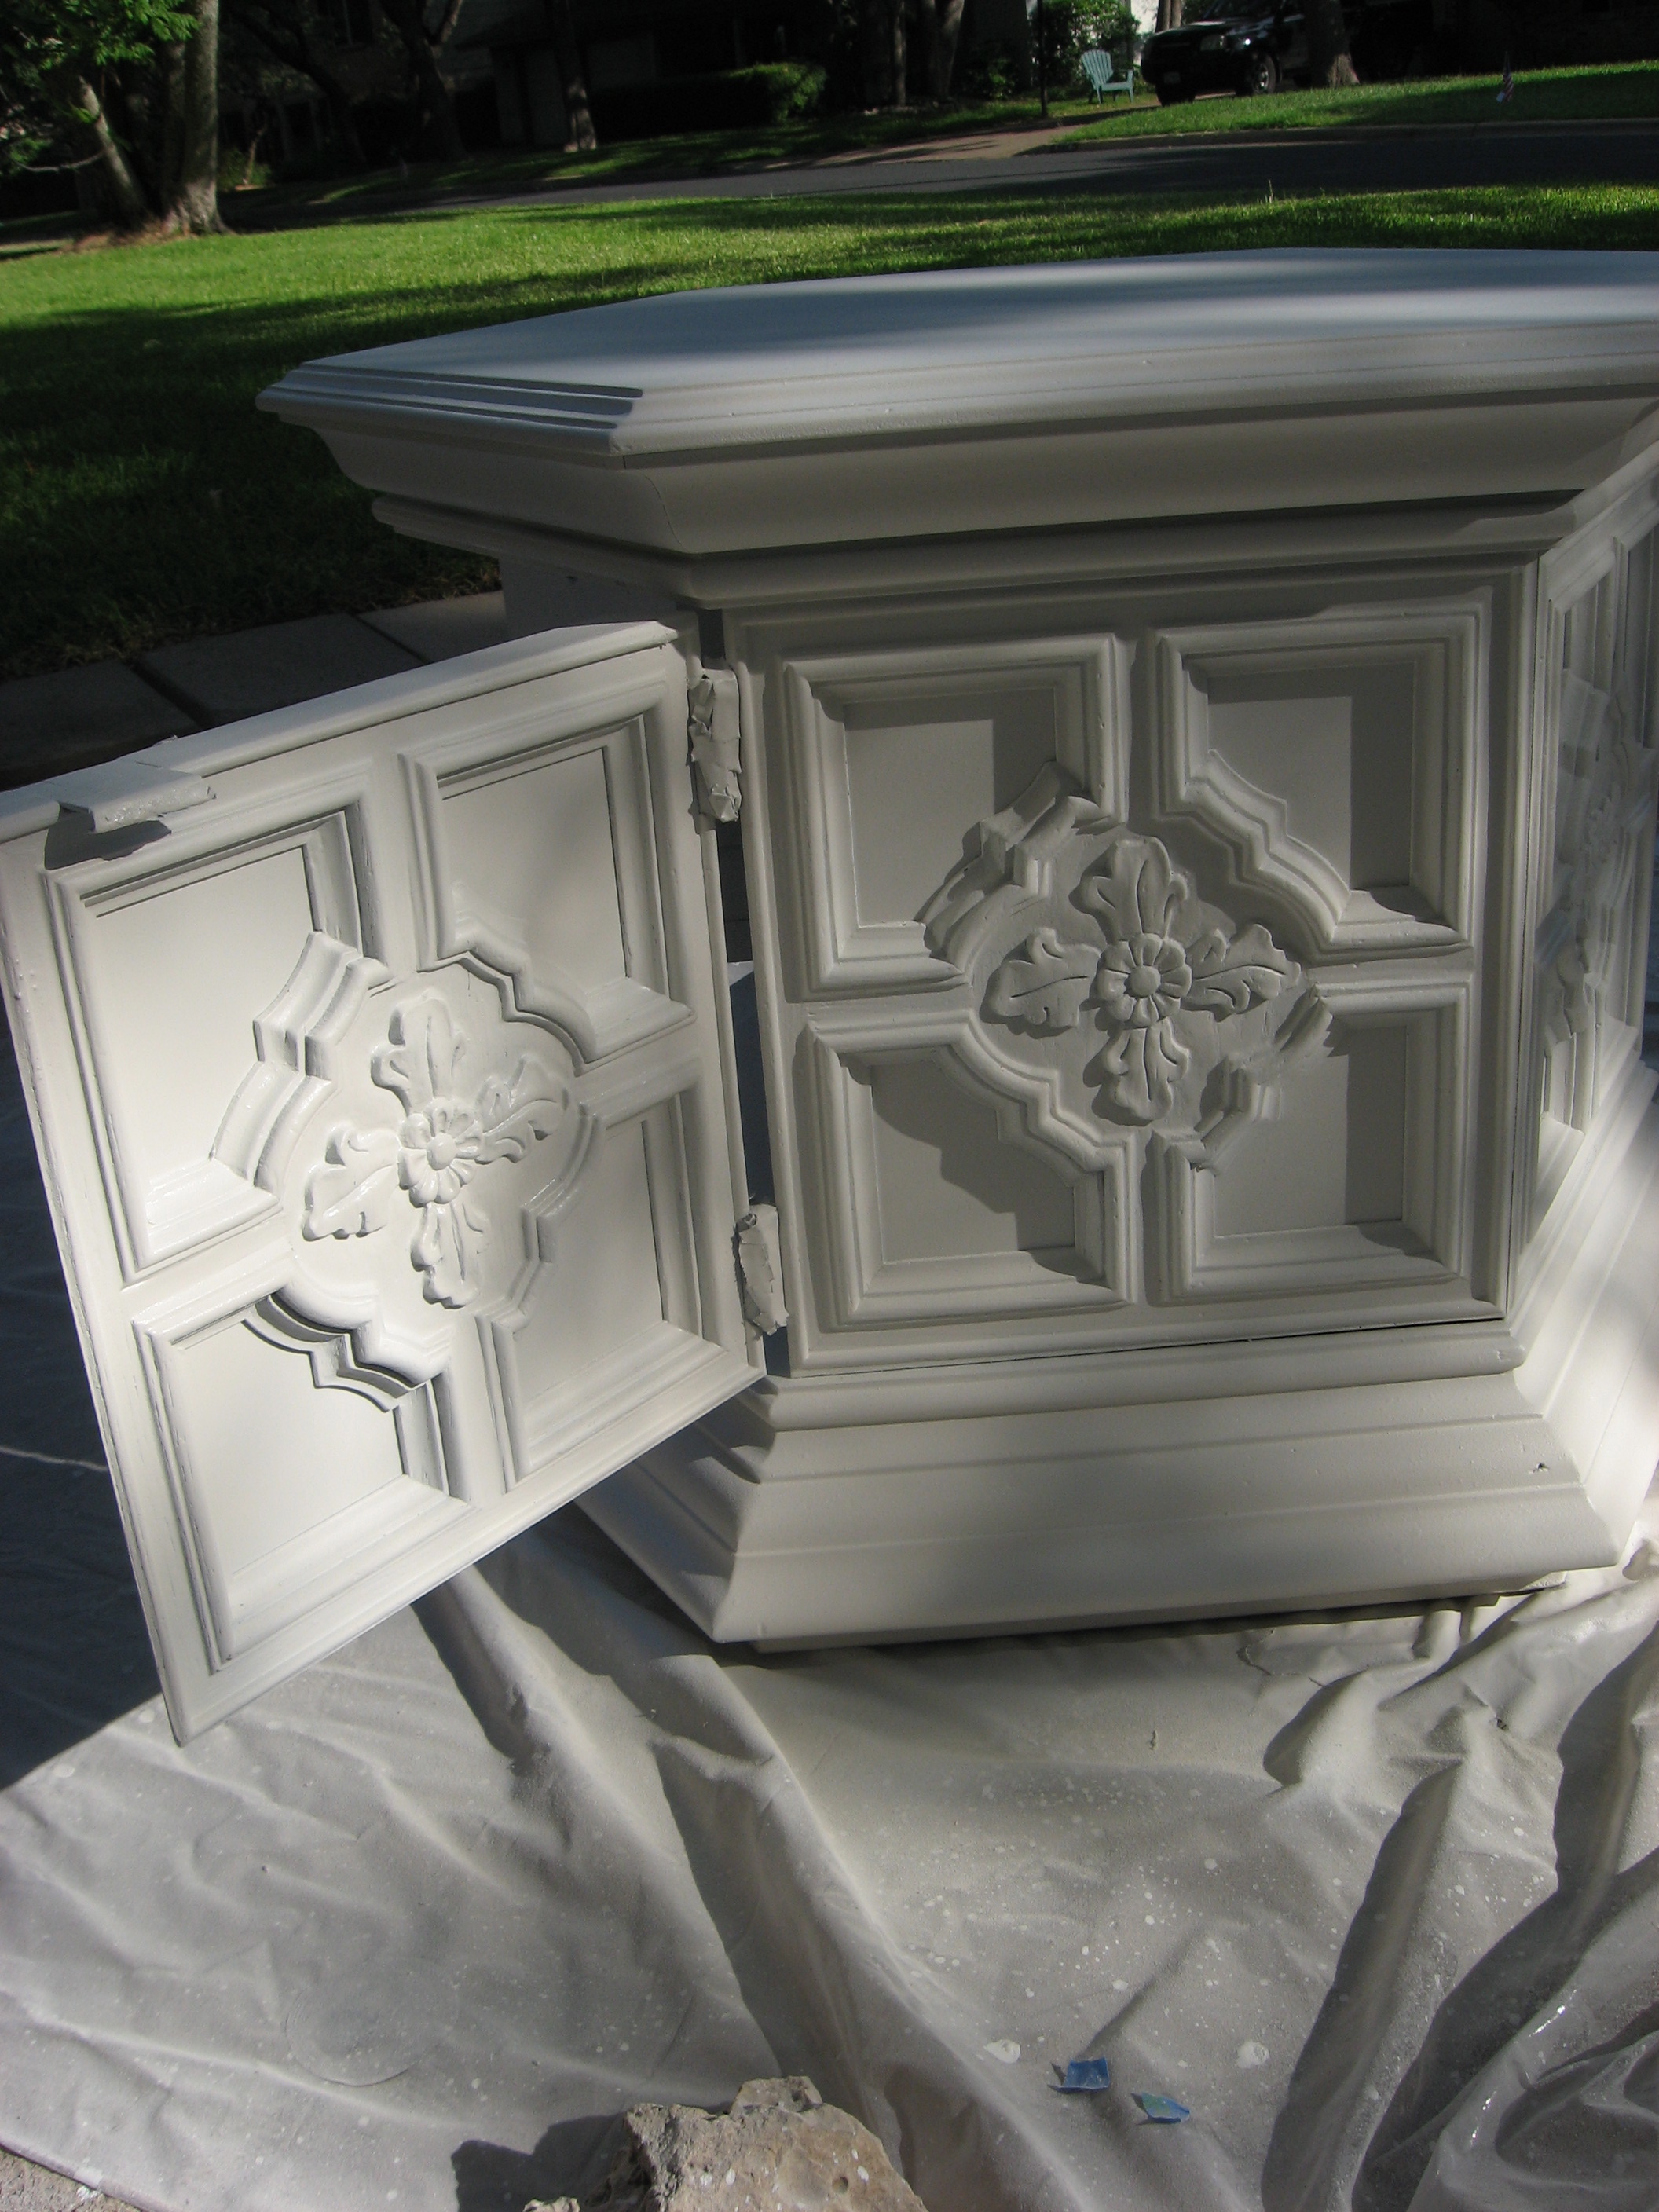
I spent a week deciding what color to paint and finally chose classic white with Krylon Colormaster in White Gloss.
So clean and fresh!
And no longer smells like 1960!

Let the Glazing Begin!
My first thought when I slathered on the glaze was: “oh no! I just wiped mud all over my beautiful white paint! How do I get this stuff off!”
I was really nervous, but just chose to trust all the bloggers who instructed simply wiping off the glaze with a damp rag.
I looked at many, many glazing tutorials on-line. The technique I chose to follow was Mandi Gruber’s “clean glazing” over at Vintage Revivals.
Anyway, Step 1 is to paint the glaze on with an inexpensive brush, paying special attention to all of the detail. Like this:

Step 2: Wipe off the majority of the glaze, but not all of it. Like this:
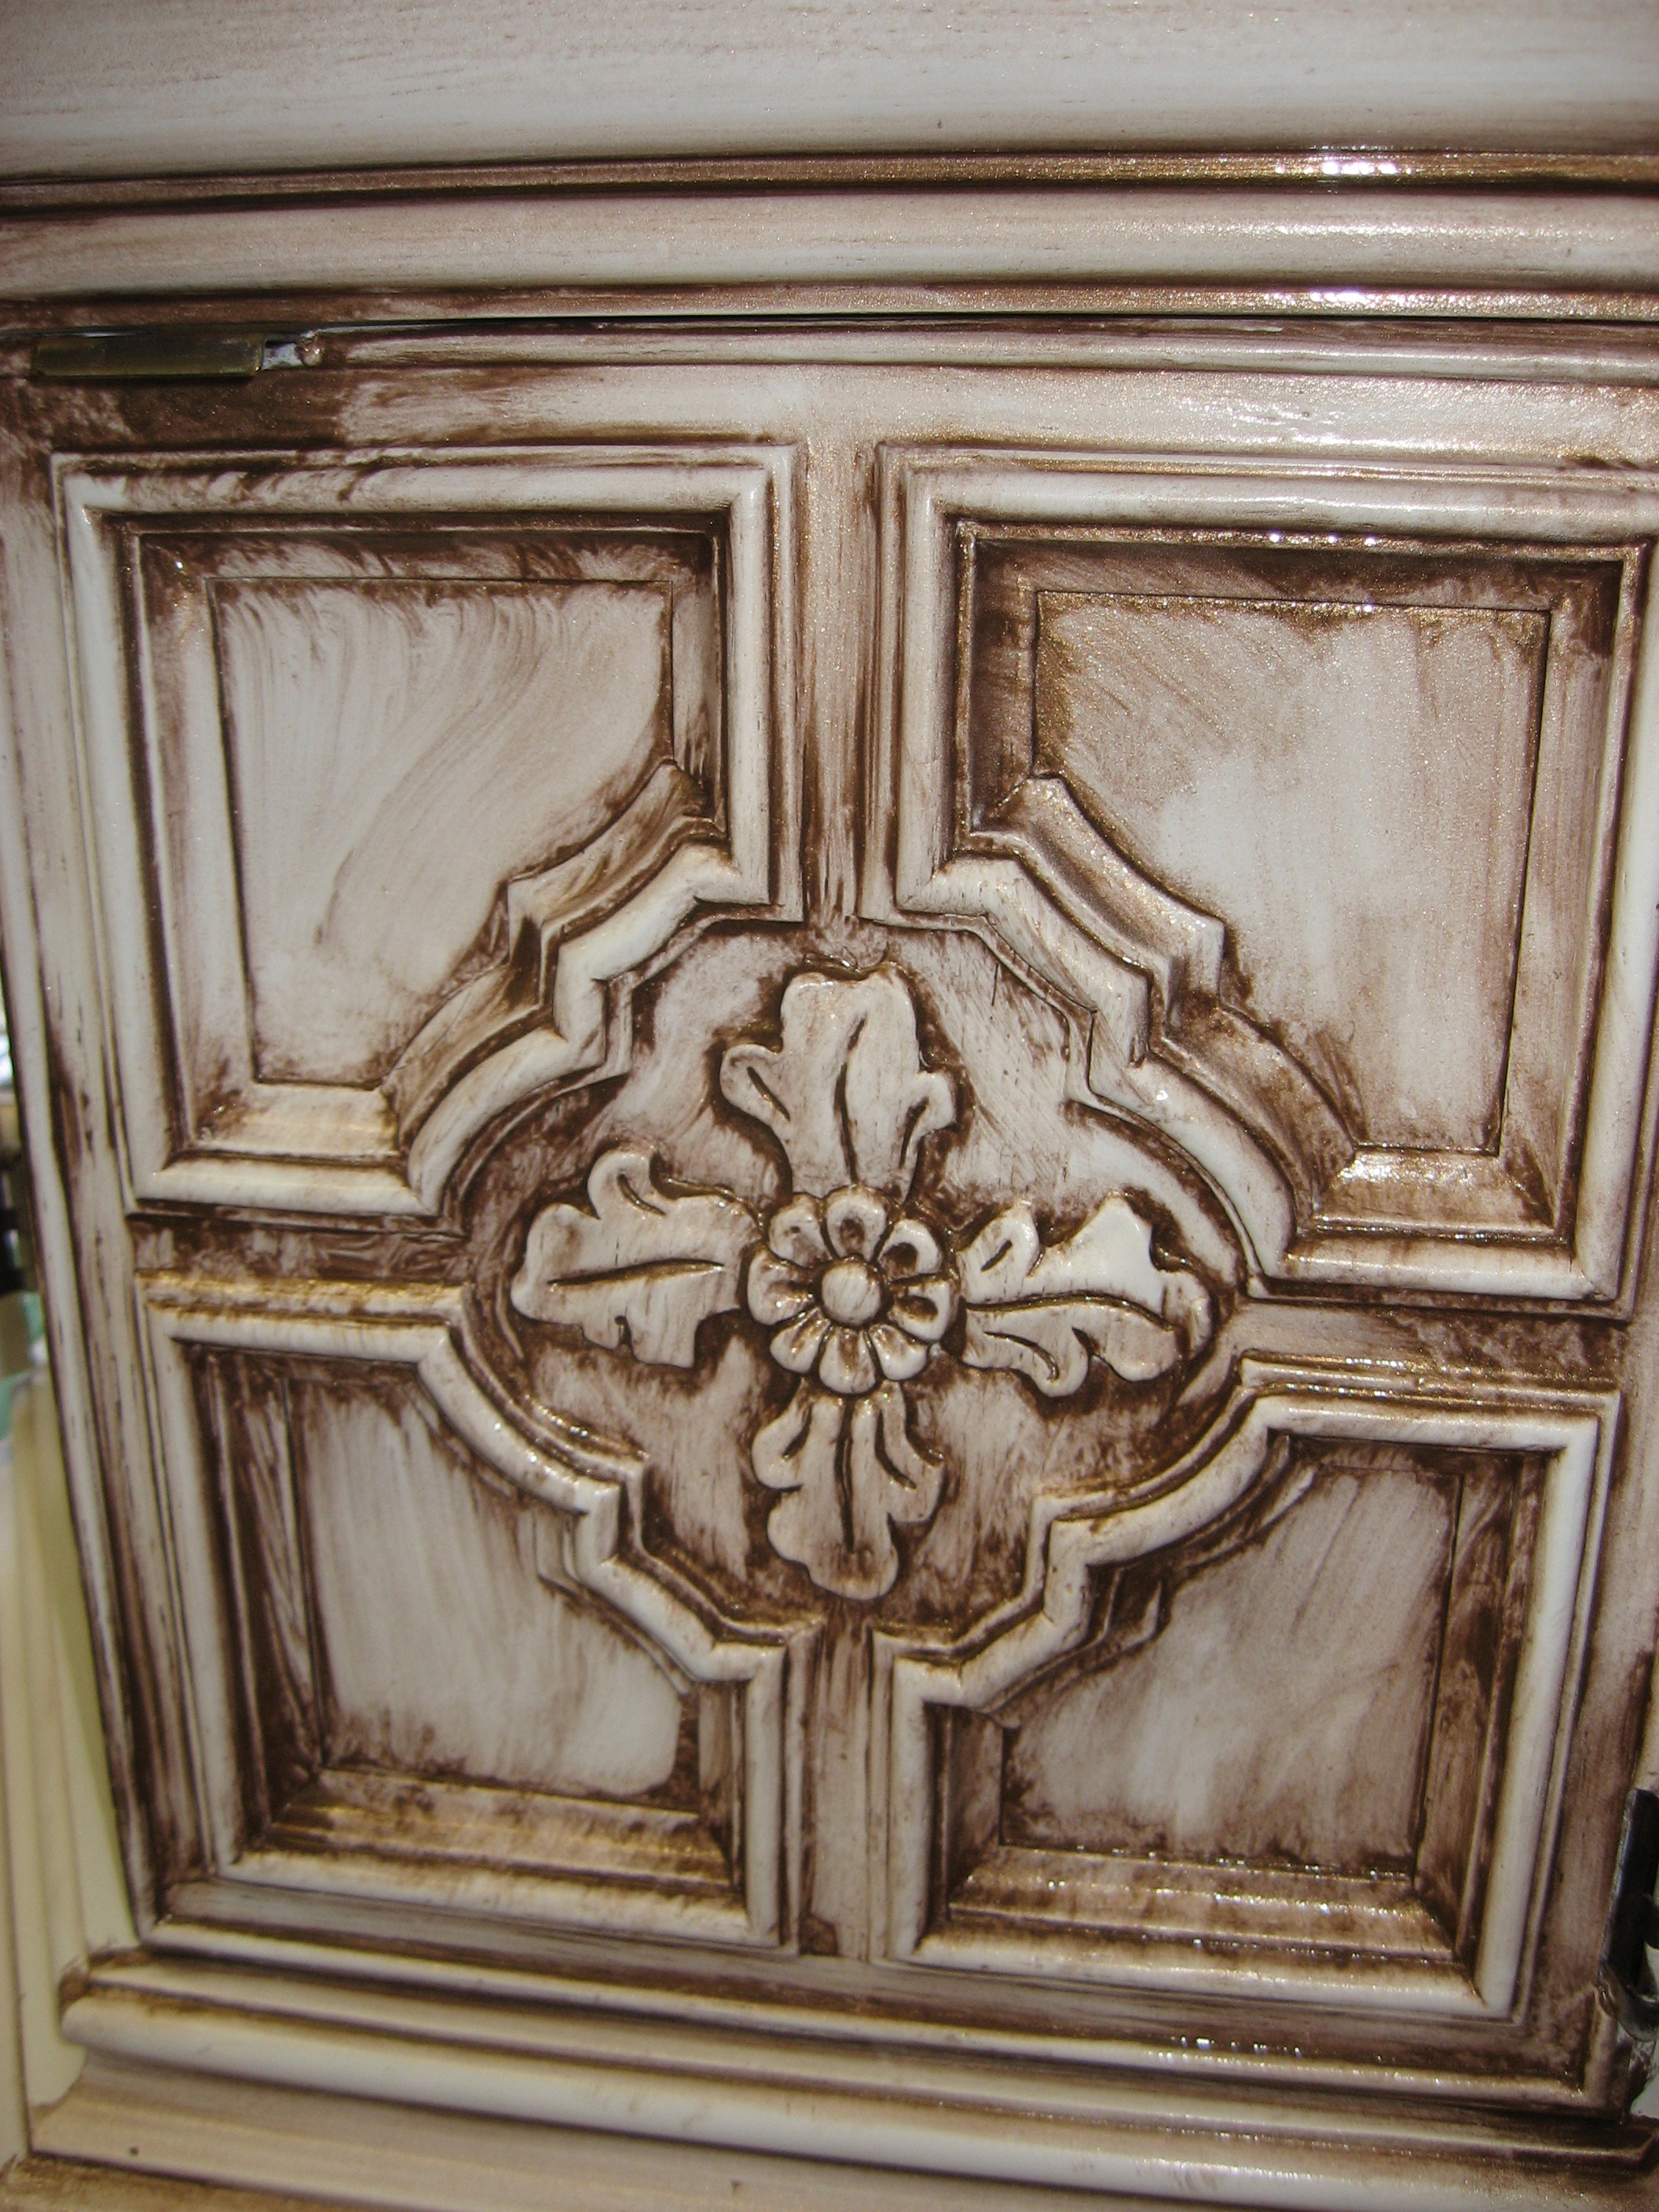
Step 3: Using a clean, dry paintbrush (not the one you used to apply the glaze), move it in circles everywhere the glaze is, essentially drawing it out from the cracks so that you can wipe it again. Like this:
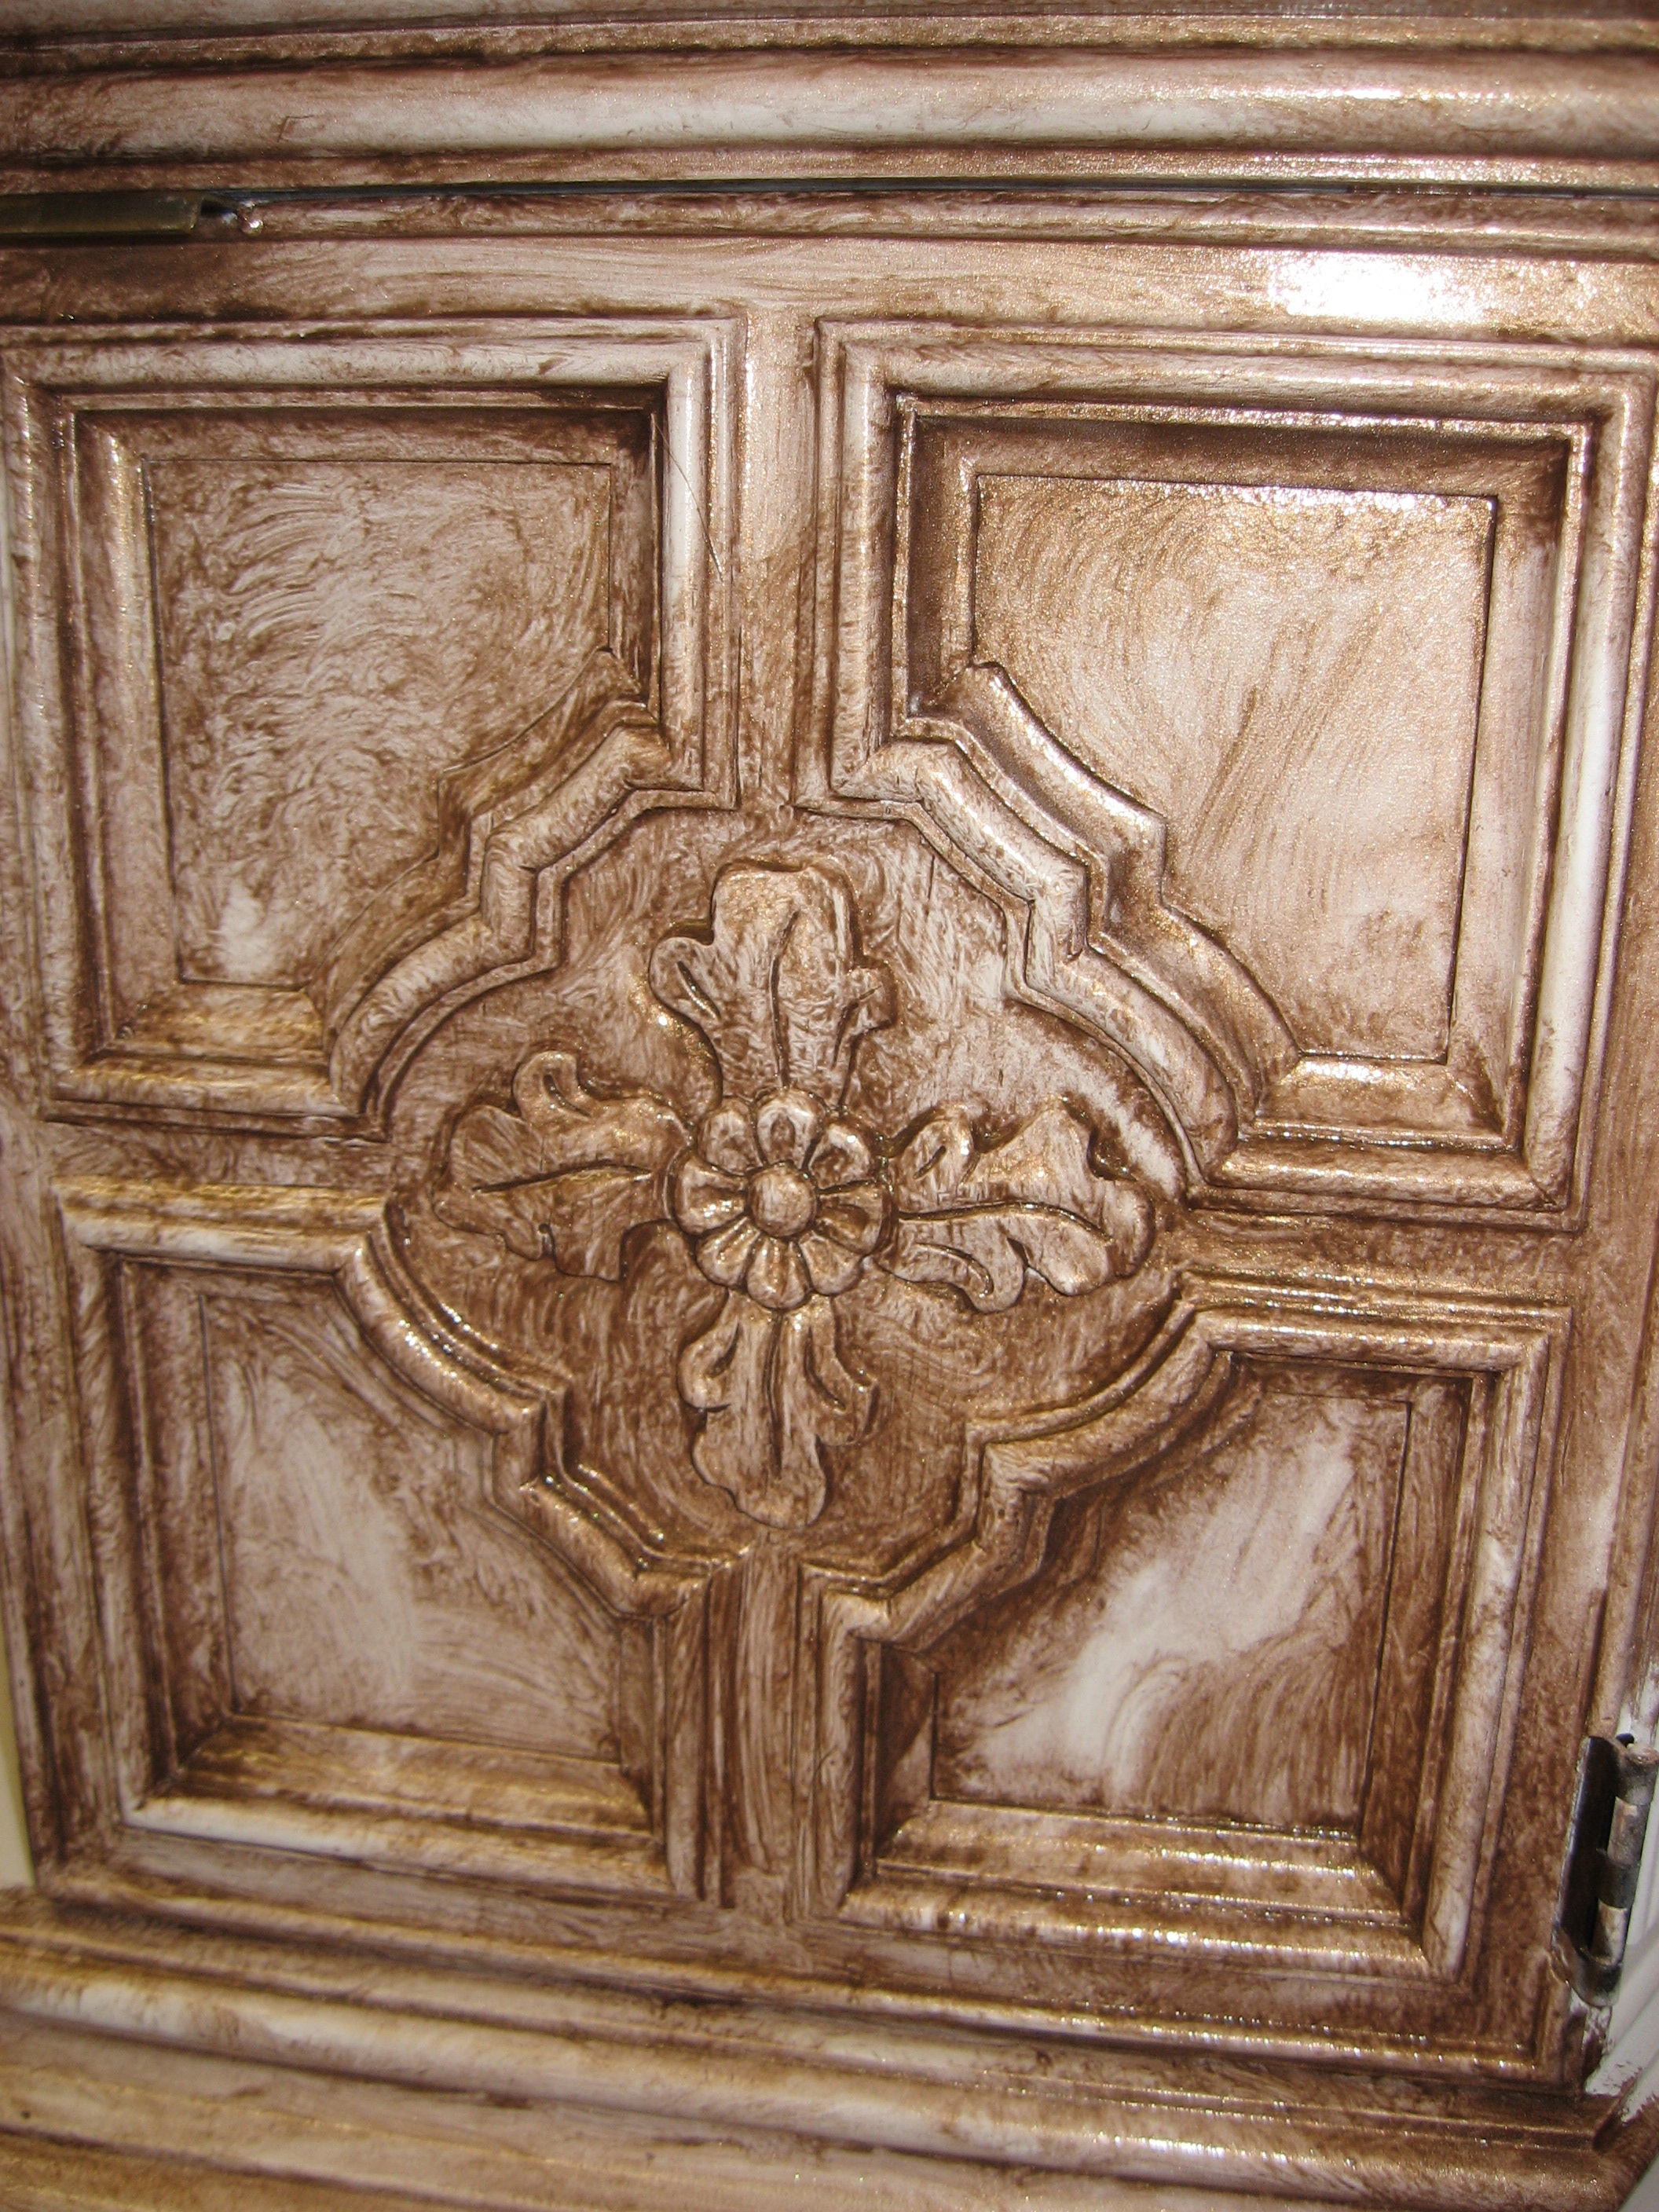
Step 4: Start wiping again until you achieve your desired look. The top part in this photo is the final wipe down, the bottom part of the photo is just after dry-brushing.
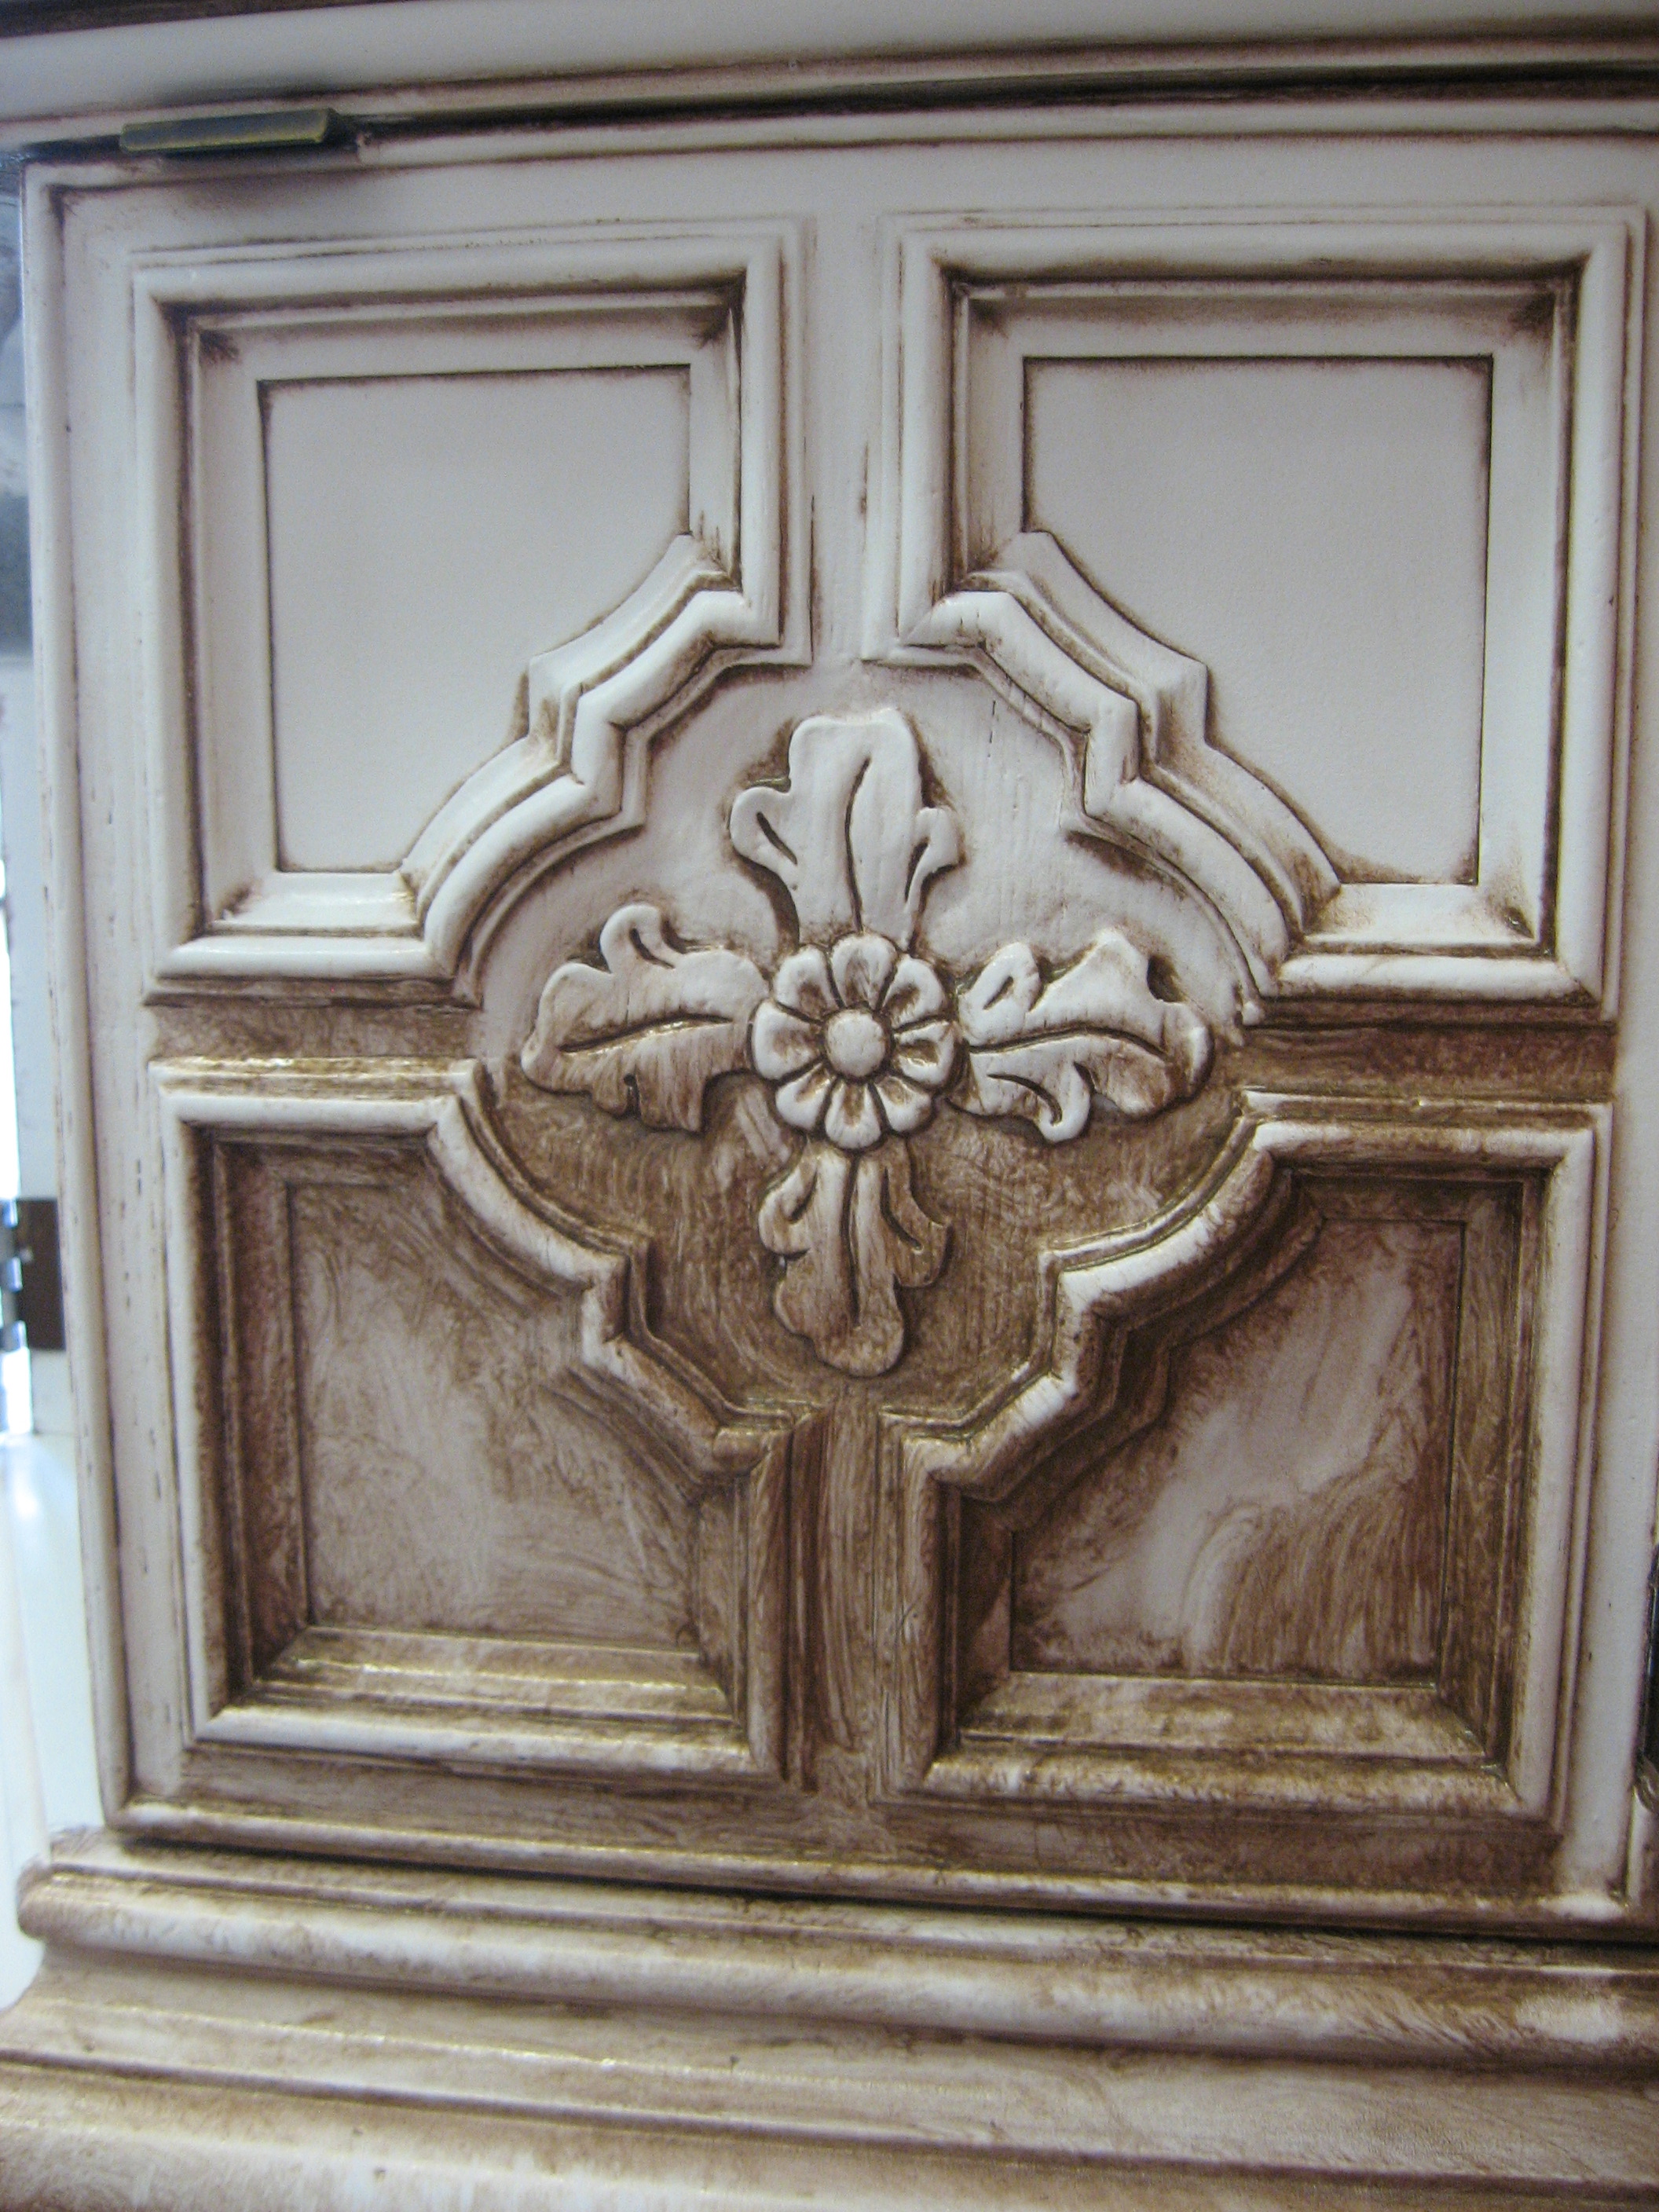
After “Clean Glazing”:

Side-by-side comparison before and after glazing:

Some yummy after photos:


The next piece I’m planning to tackle is this vanity bench I picked up at an estate sale last weekend:

My next project!
Happy Weekend!


9 Responses to “My First (Extreme) Furniture Makeover!”