
I recently completed transforming this antique vanity bench from this:

To this:

I loved this bench the instant I saw it. It cost me $8 at an estate sale. The wood structure of the bench was sound, but the cushion was n-a-s-t-y.
THE PROCESS
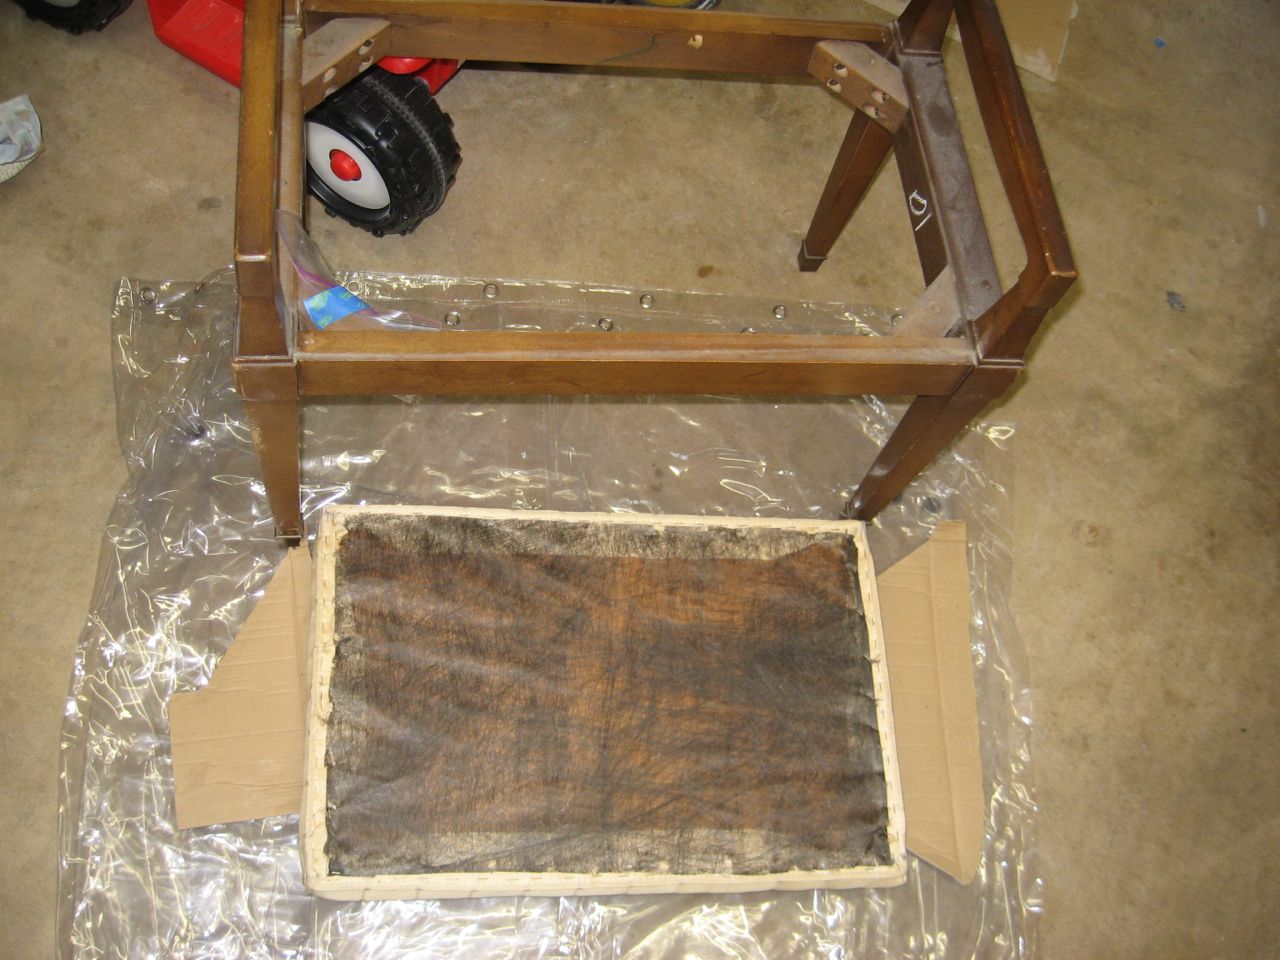
First, I removed the cushion with a screwdriver and thoroughly cleaned the wood structure of the bench with TSP. I decided to re-use the piece of plywood for the base of the cushion, which involved removing about five million staples.
Each morning for about a week, I spent ~30 minutes removing those pesky staples. That was not fun.
The fabric and stuffing from the old cushion was disgusting and smelly, so I didn’t re-use any of it.
Once cleaned and dried, I lightly sanded the piece using a 220 sanding sponge.
Sanding roughs up the top layer of finish and years of oil and dirt to prepare the surface for priming and painting. 
Then I went over the bench with a tack cloth and inserted some Q-tips in the screw holes so that they wouldn’t get filled up with paint.
My husband thought this was brilliant and asked where I learned how to do it. “All by myself,” I replied.
That was a proud moment for me.
I also taped off the brass feet, which were in great condition and boasted a pretty patina.

Then came the primer. I love this step. The old smell is gone. And the canvas is blank. Primer is a beautiful thing, and it’s necessary to use on wood that has never been painted.
I have used both Kilz and Zinsser. I find that Kilz is a bit grittier than Zinsser, but seems to provide slightly better coverage. A light sanding with a 220 sanding sponge takes care of the grit.
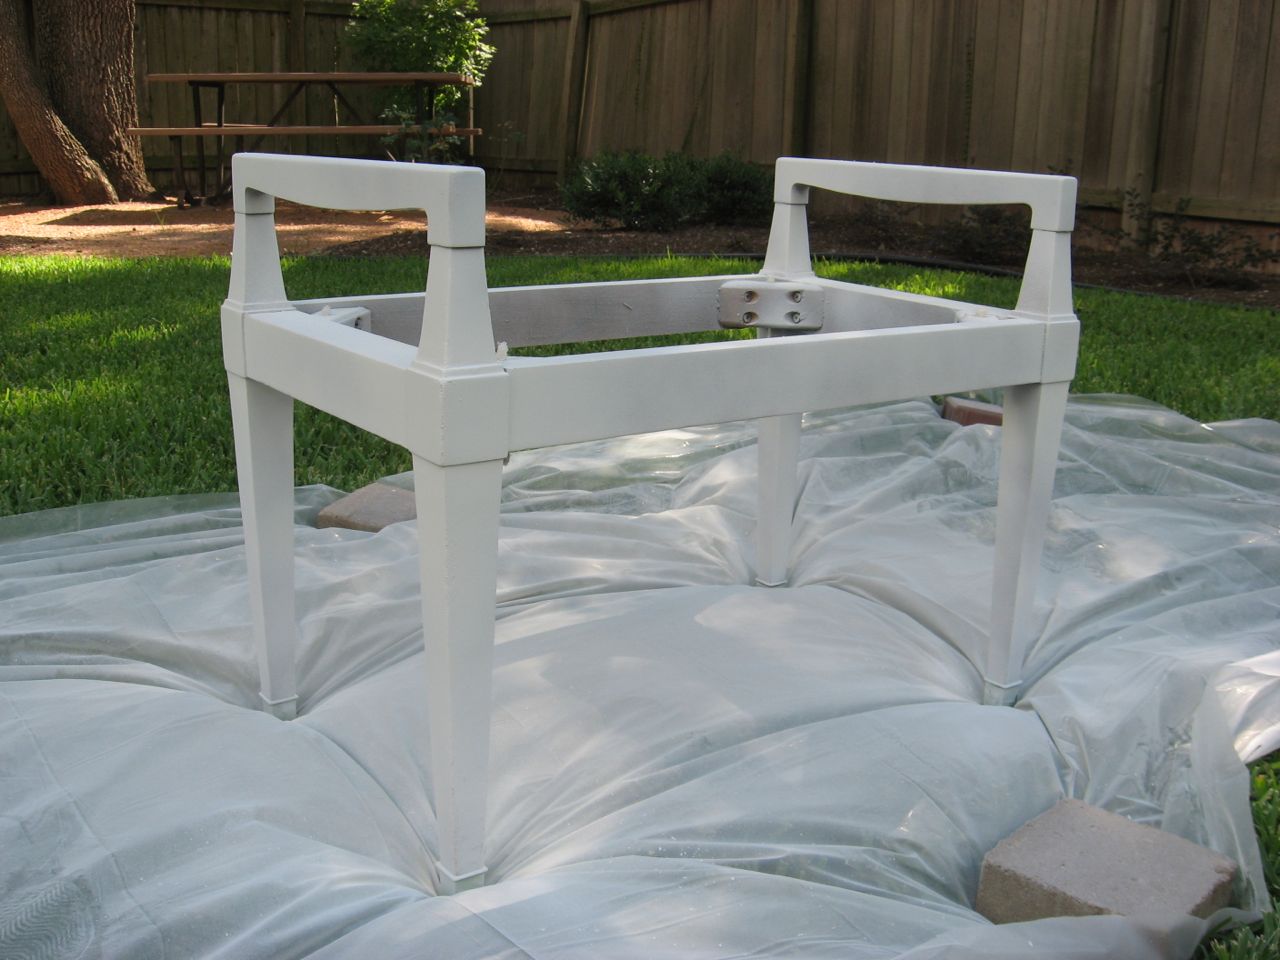
I chose Krylon Raspberry Gloss to paint the bench. Isn’t it a fun pop of color?

True story: after painting the final coat, my son awakened from his nap and we sat down at the table to have a snack. It was sunny and dry outside and then suddenly began pouring rain! I rushed outside to get the bench and was dismayed to see water drops and paint runs everywhere. The next day I lightly sanded it again and re-painted the final coat. That added time and frustration to the project, but my son got a kick out of it for days.
I opted to glaze the bench to maintain it’s antique feel. I followed the same glazing technique that I used to complete my first ever furniture makeover here.

My final step to seal the paint was to apply a thin coat of wax. I use SC Johnson Paste Wax – it’s such a pretty sheen and soft look.
Here’s a closeup of the final finish after glazing and waxing:

I found some really pretty upholstery fabric on sale in the remnant section of my go-to fabric store in Austin and thought it would go perfectly with the Raspberry Gloss paint.

For the new cushion, I stopped at my favorite bedding store, Austin Natural Mattress. We buy all of our mattresses and toppers here and I wanted to see if they had any display pieces or extras that they didn’t mind parting with.
I got a nice remnant of 3-inch memory foam for next to nothing. Memory foam doesn’t host dust mites or other nasty’s, so a quick spray of Lysol and it was ready to use.
I don’t have any photos wrapping the fabric around the foam, because it took two people and four hands! However, I followed Brooke’s tutorial over at All Things Thrifty here. All I can say is that this step was really, really hard!
Project Cost Breakdown:
–Antique Vanity Bench: $8
–Sanding sponges and primer: already had
–Krylon spray paint in Raspberry Gloss: $4
–Fabric for new cushion: $7
–Memory foam: $0
Total project cost: $19
Here’s a reminder of the before and after of my delightful new bench!


Hi Melanie – I didn’t know you had a blog I just knew you were very creative! Love the bench! Have you gotten into chalk painting? We have and love redoing chairs and tables. I found two barstools with criss cross backs the other day at a used furniture store and am about to chalk paint them. I’ll send you some before and after pics. Its lots of fun to save old things and make them better isn’t it? Rae
Thank you for the lovely comments, Rae! Yes, I have been working on a piece with home-made chalk paint and it is quite yummy looking so far. I’ll post a tutorial on that when I finish distressing it and changing out the hardware, so stay tuned. Looking forward to seeing the pics of your fab finds!